
Best Way to Apply Wall Sticker: Stickers with many components. Attempting to align a large sticker in several pieces, such as a tree trunk, is almost difficult. Once you’re done, use a clean, dry towel to run over the entire piece and press down any stray parts. Your wall sticker is guaranteed to endure for at least five years in direct sunlight and for as long as you keep it inside.
Wall stickers, also known as wall decals, are a quick and easy method to add a new look to any room in your house without having to use wallpaper or paint. Everything from little, cheapest wall stickers for a room to complete feature wall designs may be found in a wide variety of styles. Although it is simple and cheap wholesale prices, many individuals shy away from it because they believe it is either permanent or too difficult.
Table of Contents
Getting ready:
In the first place, do you have a sufficient surface? In addition to painted plastered walls, wall stickers will adhere to flat surfaces such as glass, metal, porcelain, and smooth stone, as well as untextured wallpaper. It doesn’t matter whether the surface is rough or smooth. One thing you may not know is that if the paint on a painted plastered wall isn’t at least a week old, it will come off with the sticker when you remove it.
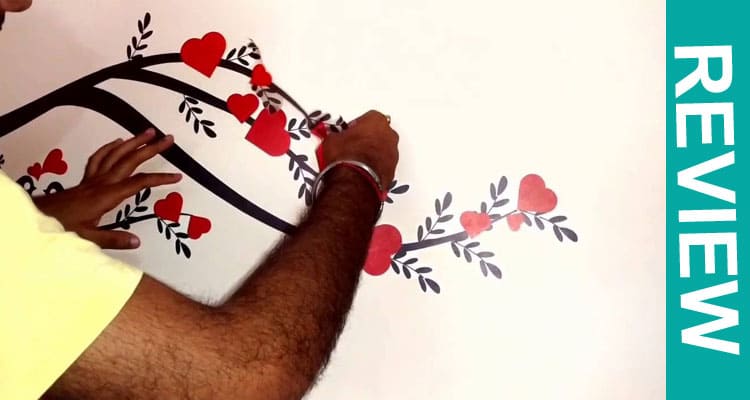
Take it out of the box, inspect it, and see whether it matches the online image or the set of instructions. How well do you know the parts of a puzzle? Is it logical? What do you think? While wall stickers may be readily trimmed with a craft knife or scissors, would it seem strange if you take off half the tree trunk? As soon as you’ve sorted out all the details, cut the sheet up into its component sections. Reduce the amount of backing and transfer sheet flapping when you adhere to the sticker by cutting near to it. At this stage, you may clip off the extra backing if the sticker is simply a single large design. It will be simpler to apply the sticker if you get really up to it.
Sticking:
The sticker is sandwiched between two sheets: a transparent transfer sheet and an opaque backing sheet. Crinkle the backing sheet at its top by peeling away approximately three or four inches of it from the sticker’s surface and folding it in half horizontally. Simply walk across the room with the sticker in place.
Assisting Material:
Slowly remove the backing sheet from under the sticker and smooth it out with a straight edge on the wall. This is the perfect time to use an outdated credit card or a shop card. Take your time with this step, since it’s possible for pieces of the pattern to become tangled in the backing sheet and slip out of sight, resulting in rips and stretching. If a portion refuses to come off, use a craft knife or your thumbnail to help it along. After removing the backing sheet entirely, use a straight edge to go over the sticker and firmly squash it down.
A Sheet for Transferring Data:
The transfer paperwork has been removed. Take a piece of the top and fold it in half, then begin to draw it down from the top. Keep your hands on the adhesive side of the transfer sheet and carefully slide it down the wall, keeping it flat against the wall as you go. At this point, if any of the stickers come loose, use a dry clean towel to smooth them out. Remember to put the extremities back from where they are pushed out to the tip to prevent rucks if they lift entirely and flop back loose. Pop any bubbles in the center with a pin if necessary.
It’s possible that you’ll become tired of the same wall sticker design after a time. This is why wall stickers are made to be readily removed without leaving behind any residue or causing any harm to your walls in the process. With no worries about permanent alterations, you’re free to chop and replace your living area in any way you choose. If you’re a college student or a renter, this is a great tool to have around.
Also Read – Theallblackagenda Com (Nov) Read the New Set of Rules.